
Most of the work we do in my group focuses on molecules or systems with somewhat complicated three-dimensional structures. A few years back, I was working on a proposal and found myself spending the better portion of a day struggling to draw a single ChemDraw graphic; it was of a compound with a stacked architecture and I was trying to fudge in a sort of 3D perspective. The process was tedious and the end result was deeply unsatisfying. It started to become clear that the work we were doing really demanded some means of rendering decent images of 3D objects, both molecules and abstract cartoons. That led to a little poking around online and eventually to Blender, a free, open source, professional-grade package for rendering 3D images and animations.
Honestly, I believe in the power of simple, elegant, 2D graphics as much as the next guy. I bought and loved The Visual Representation of Quantitative Information. Much to my students’ chagrin, I firmly believe that Newman projections are wonderful and I go out of my way to use them as much as possible. But some points are best made with literal models. Like a lot of chemists, I’ve played around with a bunch of different 3D molecule viewers over the years, most recently the wonderful (and free) Avogadro and VMD. I generated figures for many publications using these programs and am pretty happy with the results. However, these sorts of chemistry-centric programs have a limitation: they’re (of course) designed primarily for visualizing molecules and, if you’re lucky, isosurfaces. If you want to integrate other objects or elements into your graphic, you’re basically out of luck.
Sometimes, it’s not quite enough to just have a model of the molecule. For example, for one of our projects I’m often trying to figure out a way to depict aromatic stacking interactions in a simple but eye-catching way for TOC graphics. In one of our earlier papers, I messed around in VMD until I was able to fudge in a line between the centers of the stacked rings. I’m pretty content with how it turned out, but for a later paper I wanted to depict the interactions as being stronger in one case vs another. That demanded some sort of effect between the stacked rings that was more elaborate than a line. The figure below is a draft that I produced in Blender. Although we ultimately went with something a bit more conservative (see link above), I think it serves as a decent example of the sort of thing that’s trivial to do with a general modeling package.

A candidate TOC graphic for a paper. Ultimately decided it was too over the top, but I kind of like how the stacking interaction turned out.
Of course, there are many other options for 3D modeling and rendering. Maya is probably the most obvious alternative. Blender has a huge advantage, though, in that it’s open source and free. For me, and I’m guessing for a lot of other chemists, these programs are something to just screw around with, especially at the start, and it’s difficult to justify shelling out much money. Plus, Blender can generate really high quality images and animations. Way more than sufficient for the graphics chemists are likely to want. Blender also has another big positive: It uses Python as its scripting language, which a lot of us are already comfortable with anyway.
For me, the challenge (and fun) of learning Blender was that it’s totally unlike any other software that I use. It’s actually a lot closer to sculpting and photography than it is to generating graphs or bond-line structures. But there’s huge potential: you can use it to unify all 3D stills and animations in one platform, meaning you can generate consistent images with sophisticated flourishes. At first Blender will seem fairly intimidating, but keep in mind the following: for visualization of molecules, you need only the simplest features of this program. There’s no such thing as “photorealism” in molecular modeling, and you’re just building a bunch of cylinders and spheres. Only the slightest bit of actual expertise is needed to use Blender as a chemist.
Because it’s not tied to the idea of molecular modeling, some simple actions that would be otherwise tricky are straightforward. In a recent paper I wanted to show a model with hydrogen atoms colored according to their chemical shifts. In Blender it’s trivial: just select an atom and change the color of its material. Most modeling programs I’ve used don’t really expect you to do this sort of thing.
Here’s another image I put together that highlights a different aspect of the program. This image is a cartoon of a smectic A liquid crystal phase of cylinders (representing rod-like molecules). I wanted to add a little disorder to the orientations and positions of the “molecules” so as to differentiate this image from a similar cartoon of a crystalline phase. To do this, I played around with Blender’s game engine. This is exactly what it sounds like; for the purpose of this image it allowed me to give the cylinders real mass and physics. I then built an (invisible) box and just kept dropping the cylinders into it until I got the amount of disorder that I was looking for.
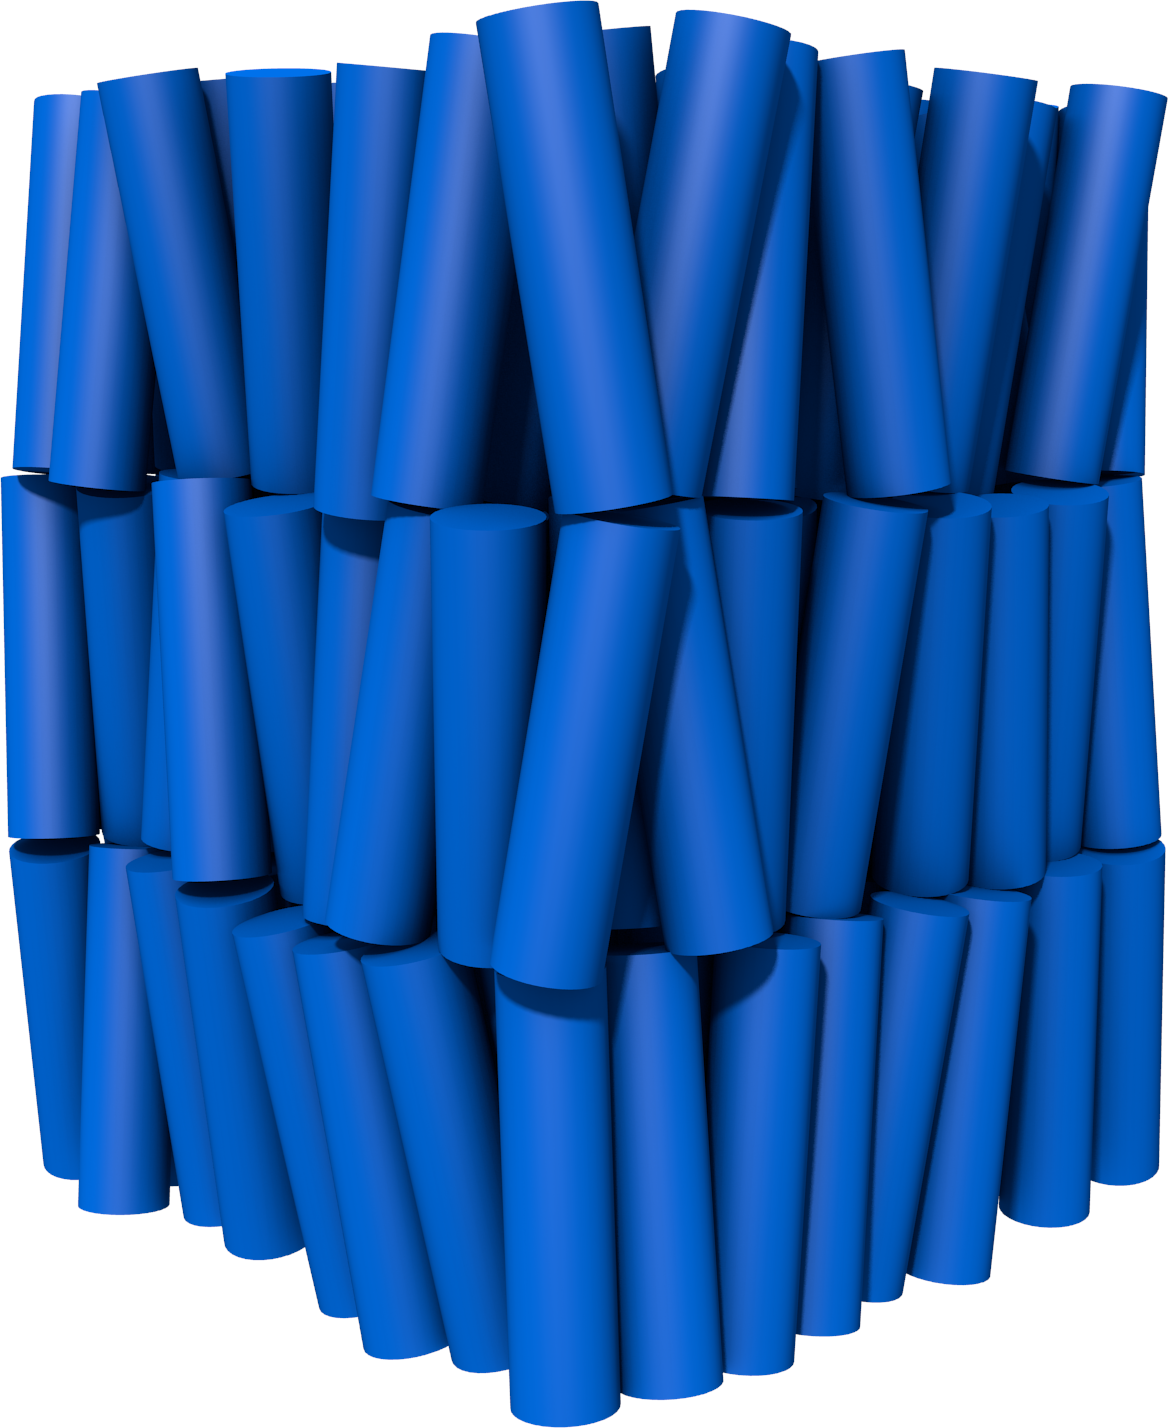
Cartoon of a smectic A liquid crystal phase, generated in Blender.
Here’s another example of a model of an ortho-phenylene that I generated in Blender, this one combining a molecular geometry with another element, a helix to highlight the compound’s secondary structure. The helix is actually quite easy to generate: the program has tools that allow this sort of thing to be done automatically. The hard part is really getting the molecular geometry into the program.
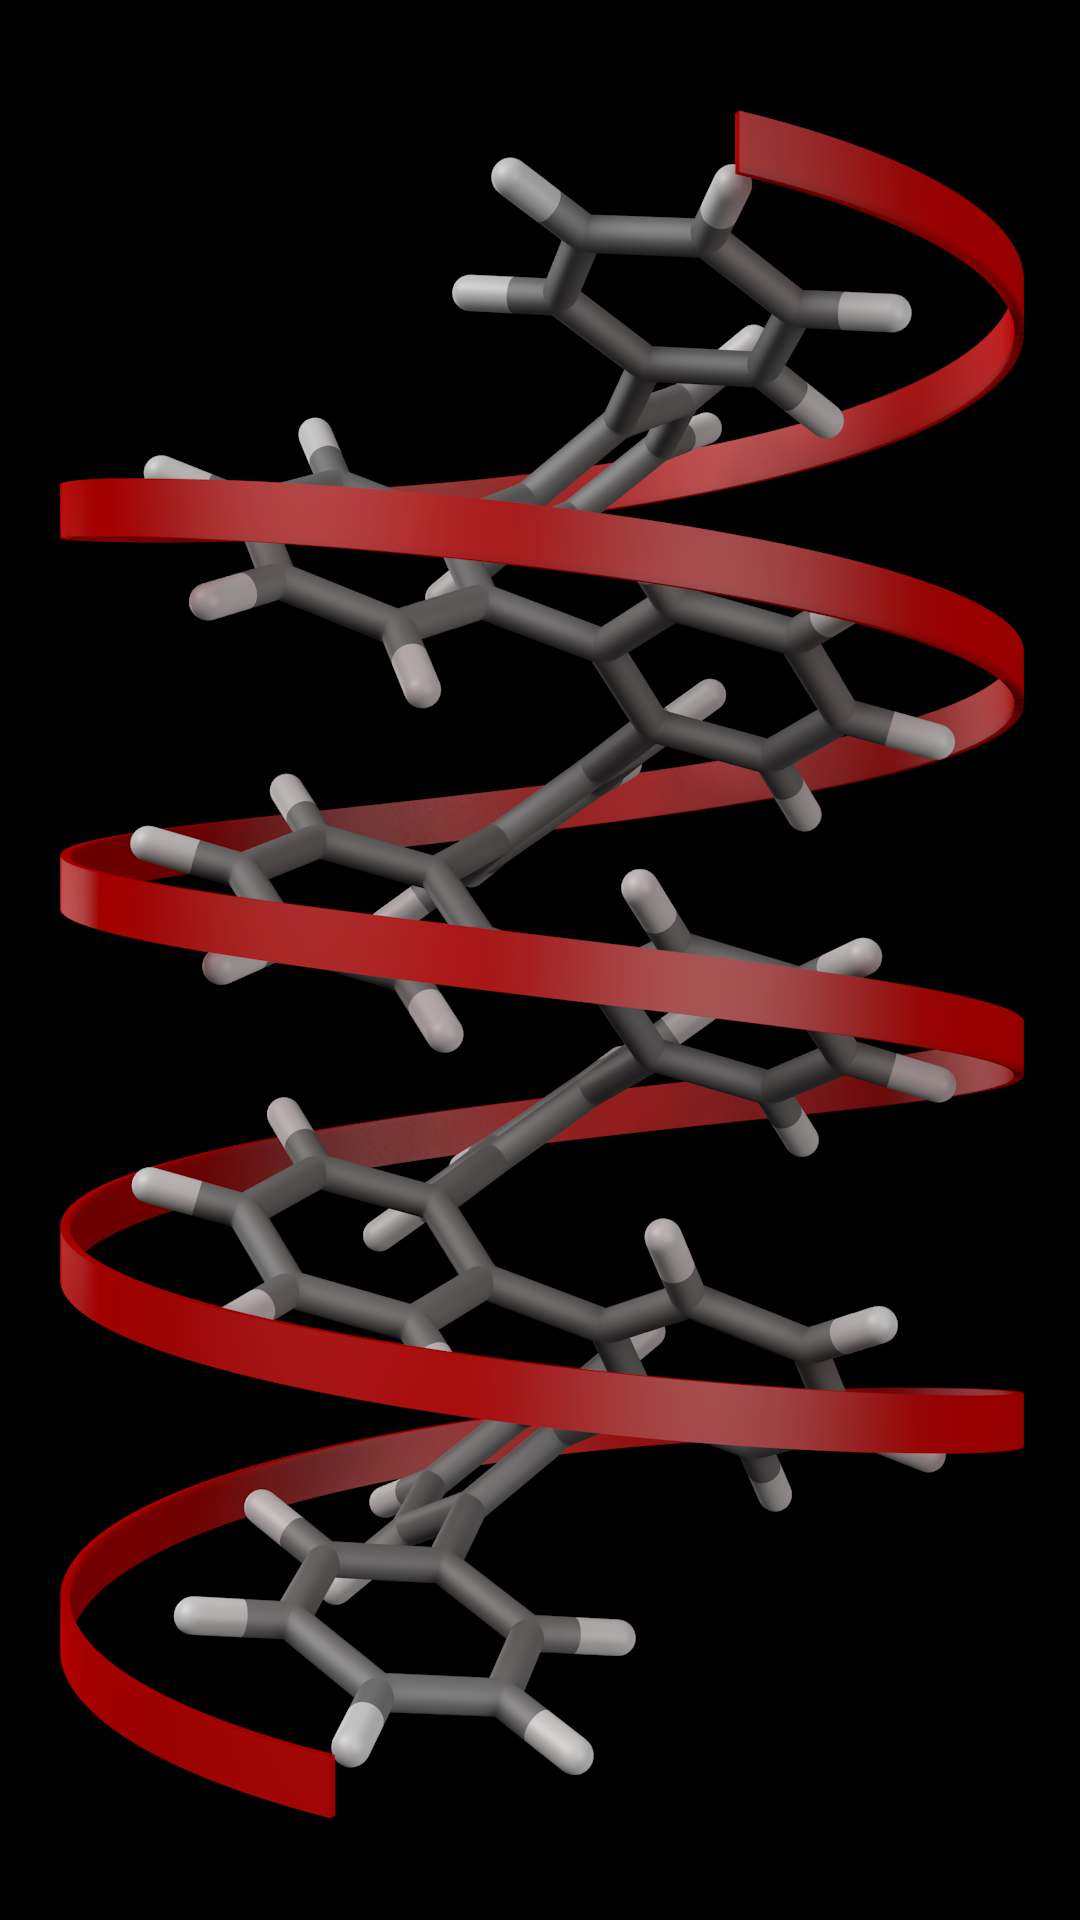
Rendering of an ortho-phenylene with a helix..
Unfortunately, there’s really no way for me to provide a complete Blender tutorial. That would literally take up a book. Fortunately, such books exist and are generally pretty easy to follow. I used Blender Foundations, which was great, but may be a little out of date at this point. There’s also a large online community and quite a lot of how-to information can be had with a little clever Googling. For example, to get the glowing effect of the yellow hexagons in the image above I spent a few minutes learning how the render lightsabers.
Instead, I plan to focus on providing a how-to for importing molecular geometries into Blender. Once you get the hang of it, I would argue it’s actually easier and faster to render molecules in Blender than in most other programs, and the results are very high quality.
To get started building graphics for papers, you really only need the basics: some familiarity with the interface (which is actually probably the biggest hurdle), a basic knowledge of manipulating objects (moving, rotating), a basic knowledge of materials, and a basic knowledge of lighting and cameras. A lot of the more advanced features (animations, painting textures, etc.) aren’t that important at the start. Heck, you don’t even really need to know how to build models if all you’re doing is rendering molecules, since the script I’ll share takes care of that for you.
In the next post I’ll share my basic template file, which is essentially like a studio in that it has a basic lighting setup and camera placement. I’ll also share the script that I use to generate simple space-filling, bond-line, and ball-and-stick images.
If you already know how to use Blender and are just interested in the script, it’s currently available on github.