In the last post, I talked about my experiences using Blender to visualize different aspects of my group’s research. In this post, I’ll give a quick introduction to the script I use to import geometries into Blender along with the template I import them into. The script brings in structures in PDB format files and can generate bond-line or space-filling models.
First, a quick note: After the last post, I got into a few discussions on Twitter. One suggestion that came up was the Atomic Blender plugin. My memory’s a little hazy, but I think I took a look at it years ago when I first started using Blender, decided it wasn’t for me, and then eventually wrote the little script I’m going to discuss here. However, it’s been a while, and I’ll take a second look at this plugin as it may be a more accessible, general solution to the problem of getting molecular geometries into Blender. I’ll report back once I’ve had a chance to revisit it.
For now, let me stick to the script that I use, called “blmol”. You can download the exact version I’m discussing or, more generally, get it from its GitHub page where updated versions will be posted.
This is a quick how-to, but I’m going to assume a basic knowledge of the Blender interface. There are a lot of books and online resources available for learning Blender. If you’re just getting started, I’d strongly suggest playing around with it a bit, at least to the point of manipulating the view, adding new objects, moving things around and rotating them, and switching between layers. No real knowledge of lighting or materials is needed at this point.
Installation
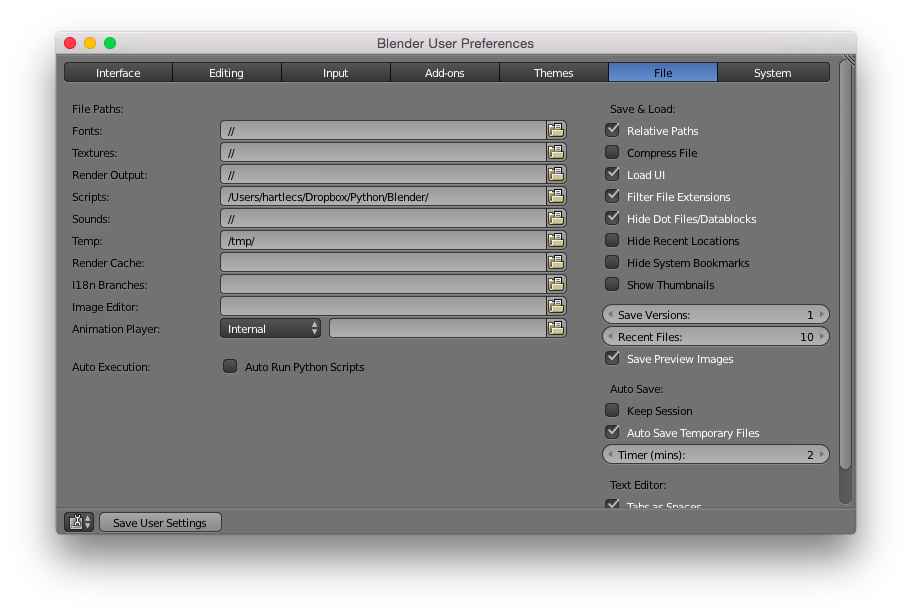
The script is installed by simply copying it to Blender’s scripts folder, as defined in the preferences. I leave mine in my Dropbox folder so as to keep it in sync between my desktop at work and my laptop. Note that the scripts folder has to have a specific layout (startup/, addons/, modules/ subfolders). The blmol.py file goes under modules.
A quick note: the script depends on the NumPy package to help with some of the geometry calculations. I was under the impression that Blender now included NumPy by default, but that might not be the case. After my last post, Louis from the biochemistri.es blog gave the script a try and had to install NumPy manually. See his post and the follow-up for more details, as well as some screenshots and thoughts on Blender, BioBlender, and Maya.
Still having trouble with the installation? Feel free to leave a comment and I’ll be happy to try to provide amateurish advice.
Basic use of the script
I use a basic Blender template file that you can download here (also included in the GitHub repo). The template includes a basic three-point lighting setup and a camera. I keep them on layer 10 to keep them separate from whatever objects I load in. The lighting is pretty bright and with minimal shadows so as to give renders that (in my opinion) are well lit for publication (a little texture but no dramatic shadows).
For the purpose of this example, you’ll need a pdb file of a simple molecule. If you don’t have one handy, feel free to use this PM7 geometry of Tamiflu.
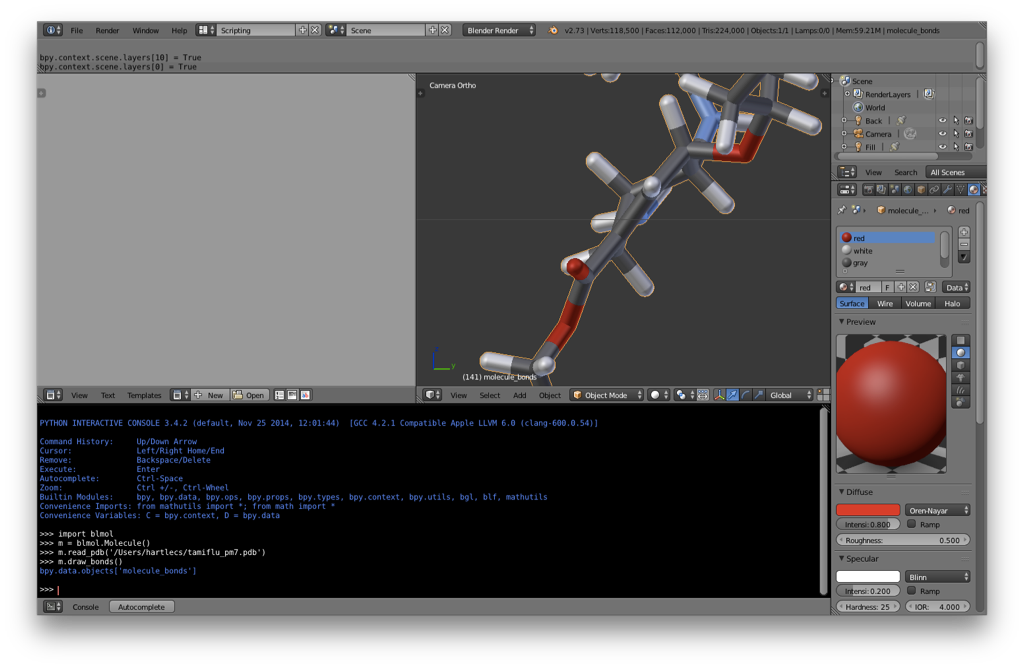
I’d suggest making sure that you’re on layer 1 before adding the molecule. Then, switch to the Scripting layout:
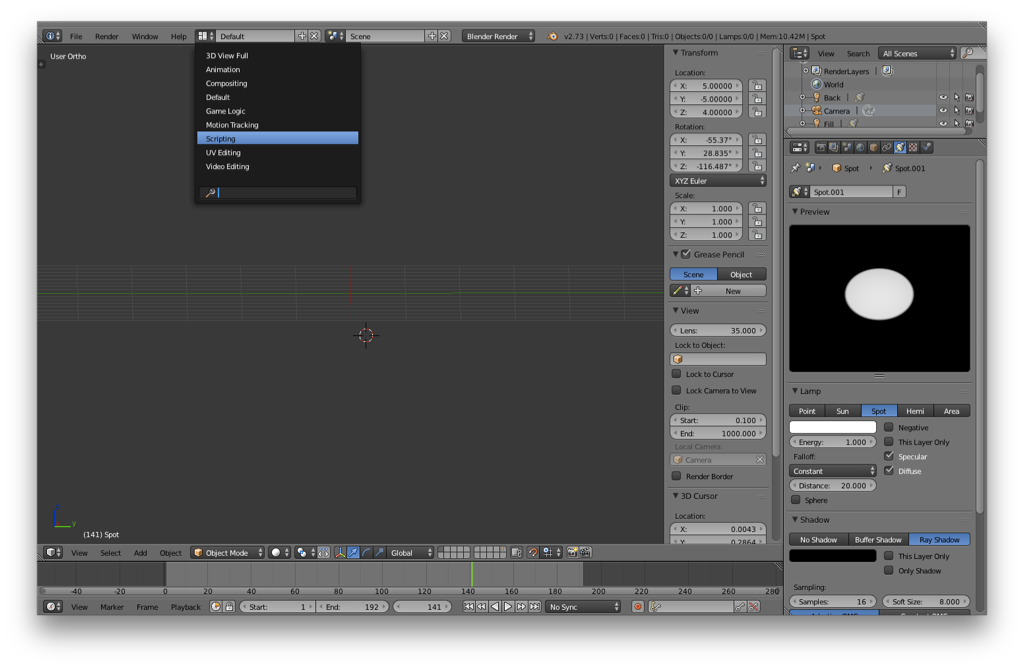
Your screen should now look something like the following:
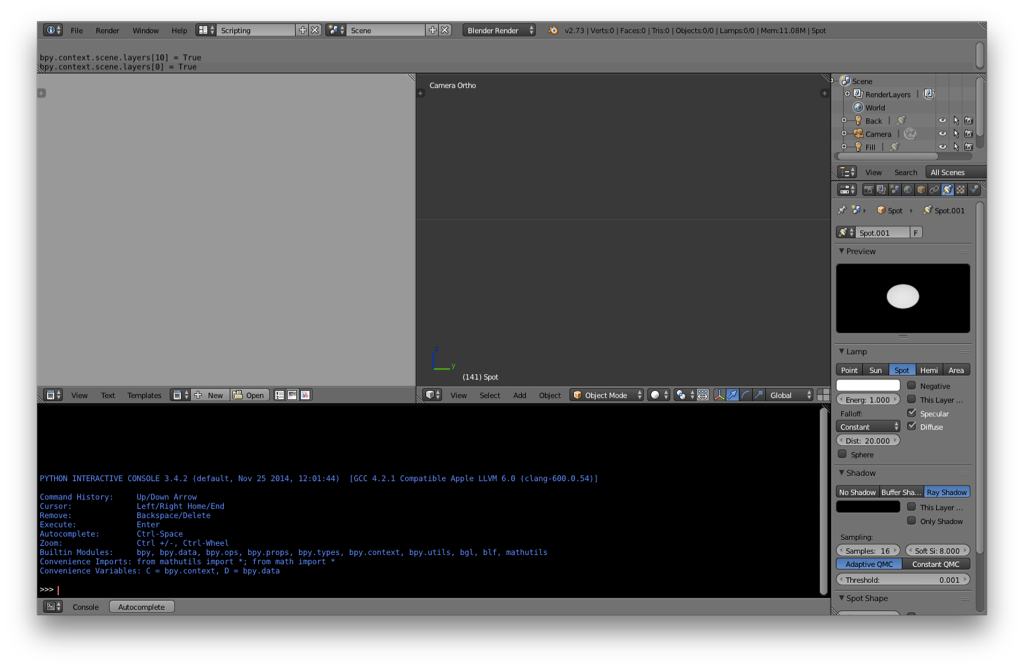
In the scripting window, type the following:
import blmol
m = blmol.Molecule()
m.read_pdb('/path/to/pdb/file/pdbfile.pdb')
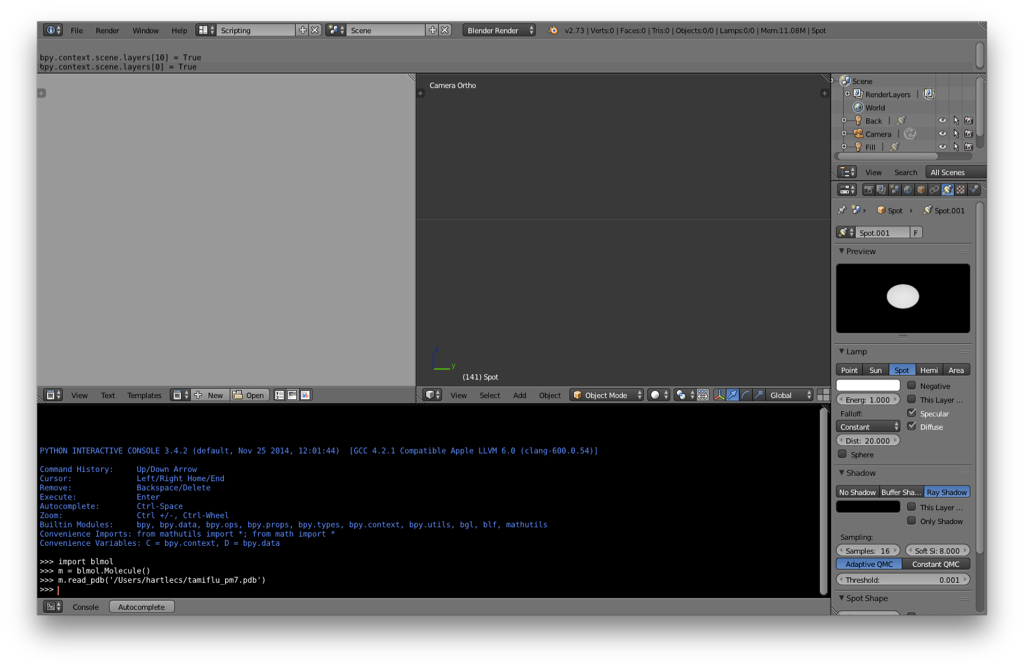
If everything is set up correctly, you shouldn’t notice much of anything happen (i.e., no error messages). What this does is to load the blmol script and create a new “Molecule” Python object called “m”. We then read the geometry from the PDB file into m.
Then type the following:
m.draw_bonds()
This command creates a new Blender object of a bond-line structure of the molecule.
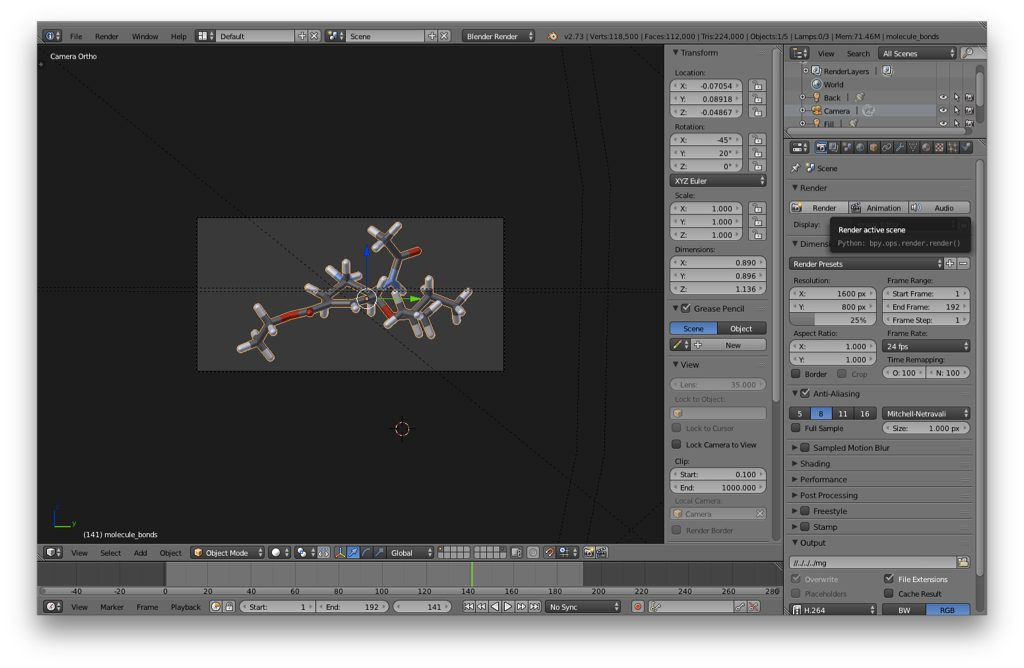
You can then switch back to the default layout and render the molecule as you would any other Blender object. I’d recommend the following:
- Set the molecule’s origin to its center by hitting space, type “Set Origin”, and then choose “Origin to Geometry” (or use the hotkey).
- Rotate and position the molecule in front of the camera as desired. I usually use a orthographic camera for scientific figures.
- Render the molecule. Don’t forget to select layer 10 so that the lighting is included in the render.
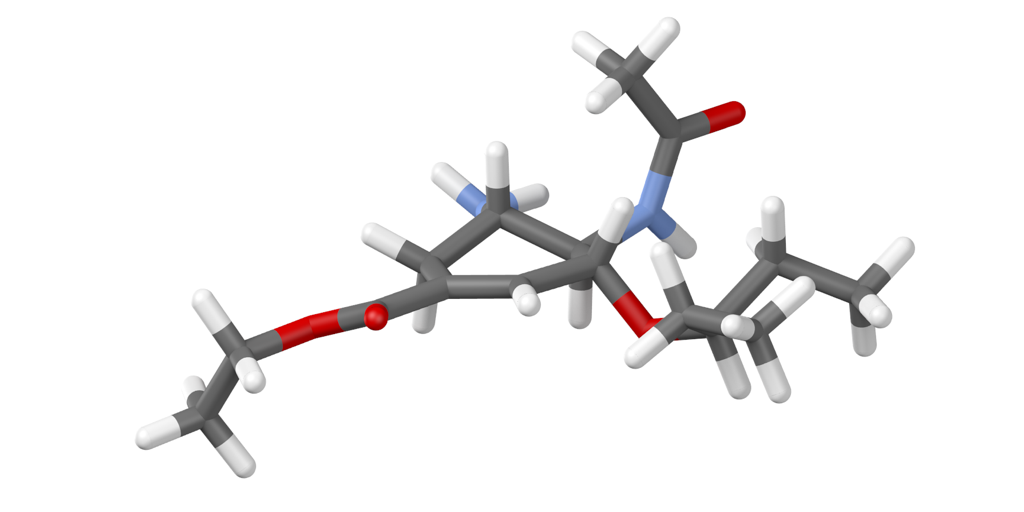
Here’s what I got, admittedly not having exactly framed it for aesthetics.
Alternatively, you can create a space filling model using m.draw_atoms().
The script has a bunch of options to play around with (e.g., changing the colors, the radius of the bonds or spheres, etc.). There are descriptions within the script itself. A very useful command, however, is the console autocomplete (button at bottom of console or ctrl-space hotkey). After typing part of a command, hit the button and it will either provide a list of possible completions or help on the current command. For example, by typing “m.draw_atoms(” and then hitting autocomplete you should see the following text:
draw_atoms(self, color='by_element', radius=None, units='nm', scale=1.0, join=True, with_H=True)
Draw spheres for all atoms.
Args:
    color (str, ='by_element'): If 'by_element', uses colors in
        ELEMENT_COLORS. Otherwise, can specify color for whole
        model. Must be defined in COLORS.
    radius (float, =None): If specified, gives radius of all
        atoms.
    units (str, ='nm'): Units for 1 BU. Can also be A.
    join (bool, =True): If true, all atoms are joined together
        into a single Bl object.
Returns:
    The atoms as a single Blender object, if join=True.
    Otherwise, None.
This is just the docstring from the script itself, but it gives a list of possible options. For example, m.draw_atoms(color=’red’) will draw a space-filling model will all of the atoms colored red instead of by element. m.draw_atoms(scale=0.8) will draw a space-filling model with all atoms scaled to 80% of their default sizes.
And that’s basically it. The workflow is to just load the template, load the PDB into a Molecule object, generate the model, and render. It just takes a minute or two. In the next posts I’ll discuss other elements of the script and demonstrate rendering simple molecular animations.
Hello,
Tried the workflow, but can’t get it right, the figure looks a bit dark and the rendered figure actually looks worse than the object view. Was wondering whether you can put a video tutorial, or perhaps include more details before the step 3 “Render the molecule” and forward, especially for Blender newbies, to reproduce the exact image (the last image) you have in this post? Not sure whether my rather ugly rendering was due to the “Blender Render” option, lighting or other settings. Many thanks!
Hmm… My best guess is that it’s not including the lamps in the render. I typically add my objects to layer 1 (and others, depending on what I’m doing) and leave the cameras and lamps on layer 10 (the one in the top right of the selection box). This is how the default template with blmol is set up.
You need to make sure that all of the layers you want to include are selected when you hit the render button (shift-click to select multiple layers). I almost always forget the lighting the first time I hit the button.
Many thanks, I found that strangely enough OpenGL rendering will give better image than the standard rendering. Another question I have is on showing double/triple bonds, it will be really awesome if blmol script can be tailored to do this, or is this a silly suggestion?
Very odd; it really should look best if you do the full Blender render. Of course, ultimately all that matters is that it looks good to you.
As for the bonds, I think it’s a bit complicated. It would be tricky to orient them properly with respect to the rest of the molecule. For example, you’d want to line them up according to an atom’s hybridization, which would probably not be too hard for sp2, but tricky for sp when conjugation is significant. I’m also not personally all that fond of that particular look for a model.
Not that it couldn’t be done, but unlikely to be something I would do myself. Of course, I’d be happy to consider a pull request if someone’s feeling more ambitious!
domperidone to increase milk supply chinakari39.tumblr.com drugs causing orthostatic hypotension