To me, one of the great advantages of using Blender to visualize molecules is that it’s a unified platform for rendering both high quality stills and animations. Even though I haven’t explored the animation side all that deeply, simple videos of rotating molecules and the like are trivially simple. I use this all the time in my courses to jazz up my lectures as an alternative to yet another bond-line structure.
Unlike the chemistry-specific modeling packages that I’ve played around with, Blender uses keyframe animation and allows basically any property of the scene to be animated. What this means in practice is that one sets values of a property (e.g., location, rotation, color, etc.) at specific frames and then Blender interpolates smoothly between them.
A really simple example is the creation of a molecule undergoing a 360° rotation. I use this to generate models of my “molecule of the day” that I can throw up on the screen for the few minutes before class starts. It’s really simple and takes only a minute or so to set up (+ time to render). My workflow is basically just this: switch to frame 1 and set a value of the z-axis rotation as a keyframe, then switch to frame 192 (8 seconds later if 24 f/s) and set the z-axis rotation to its original value + 360. Other than a little tweaking to ensure that it’s rotating smoothly and staying completely within view of the camera, it’s then just a question of hitting render and waiting.
Depending on the resolution, the rendering of the animation can take a little while; long enough that I typically get it started and then occupy myself with something else (it’s helpful to limit the number of cores Blender is using if you need to do other work on the same computer). For my little 8 s animations, using my desktop, it’s on the order of 30-60 min to get something suitable for a typical presentation. In fairness to Blender, I do very little to optimize my models for quick rendering other than changing from raytraced shadows to buffered.
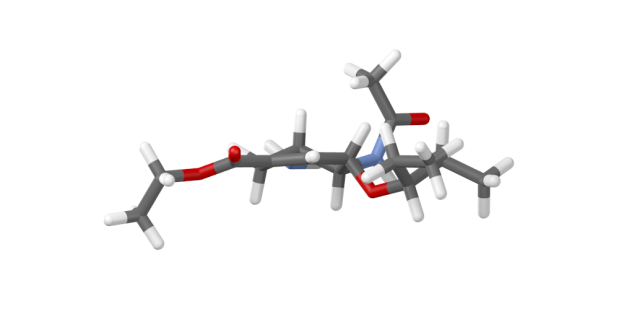
Just for the heck of it, here’s a little example using the same tamiflu model as in the previous post. I’ve animated the camera zooming in, a rotation of the structure, a color change, and finally an increase in the transparency of the material.
There’s admittedly little pedagogical value to the animation above. However, I think there’s a lot of potential to use this system to develop pretty sophisticated animations with real meaning. For example, I’d love to try to script a way to import computational geometries along a reaction coordinate. This would be even cooler if Keynote/PowerPoint offered some way to set stopping points in the middle of movies so that these sorts of animations could be more thoughtfully integrated into a talk.